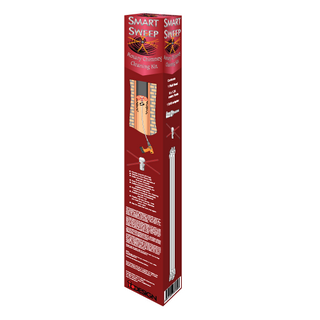
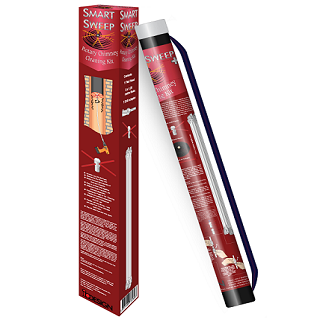
Rotary Chimney Cleaning Kit
Designed by Irish company IQ Design this drill powered rotary chimney cleaning kit is known as the Smart Sweep.
Currently only Smartsweep plus is available see here
The Smart Sweep can be used on stove flues as well as normal fireplace flues (any flue 5 inches in diameter or larger)
A power drill is simply attached to the cleaning kit a ground level through a flail. The power of the drill is used to rotate the sweeping kit and clean the flue.
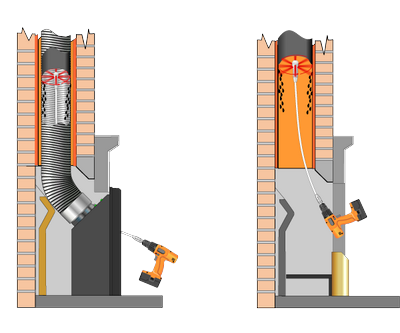
The kit will easily remove any light deposits of soot and creasote from the flue.
Each kit comes with 8 rods (1.25m each) which combine to effectively clean up to 10 meters (33 feet) up your chimney.
The rods are flexible and strong and are easy to connect together. Additional lengths can be bought separately if required.
The Smart Sweep pack is suitable for use by Chimney Sweep professionals and for DIY use and each kit also includes a flail head and 8 flails. These will remove loose soot particles and fly ash from the walls of the flue.
Watch Smart Sweep Demonstration Video
Using the Smart Sweep Kit
During use, the flails adopt a determined pattern as the drill applies rotational force to the head. The flails will fly out to a horizontal position as the speed of rotation is increased. They will deform as they encounter both the flue surface and any adhering soot and accumulations. As the Flail Head is passed up into the flue, it may be necessary to reduce the rotational speed as the head meets bends and changes in direction. No two chimney configurations are the same so experience will be gained as the equipment is use

- Insert and secure the Drill Adaptor into the drill chuck;
- Connect a Rod to the drill adaptor and the Flail head to the top end of the rod.
- Pass the assembly into the chimney or flue to be cleaned and THEN start the drill. The Flail can be rotated in either direction.
- As the Flail is passed up the chimney add Rods as needed, reversing the direction from time to time to maximize the flail impact.
- Move the rods and flail head up and down as progress is made upwards towards the chimney flue termination.
- Note that whilst the nylon rods are very flexible, there is a limit to which they can be effectively distorted. Any change of direction which forces one or more of the rods to be "bent" in excess of 45 degrees will impose a strain on the drill and could even stop the rotation. As the user becomes accustomed tot the performance parameters of the kit and the drill with which it is used, any usage and site peculiarities and limitations will become apparent.
Rotary Chimney Cleaning Kit Accessories
The following Smart Sweep accessories are now available to order here
Spare Rods There are eight rods supplied with this kit – providing sufficient assembly to remove soot products from a ten metre, (33 feet) high chimney. If a longer flue or chimney requires cleaning, additional rods are also available.
Spare Drill Adaptor The Drill Adaptor is suitable for any conventional drill chuck. If the Kit is to be used with an SDS power drill, reasonably priced SDS chuck adaptors and chucks are available for the purpose. Either type of drill should be set without any hammer action.
Spare Flail Head with Flails The spare Sweeping Kit Head is supplied with flails and is ready to be used. As well we supply a full set of Replacement Flails. For replacement of the Flails, please read the Flails Replacement Section from the bottom of this page.
Traditional Sweep Head can be used for brushing the chimney in the conventional manner to remove any remaining loose deposits. It connects to the rods in the same manner as the Flail Head. It is not intended to be rotated. However if you wish to rotate the Sweep Head with a power drill, make sure that the lowest speed is selected.
How to Replace Smartsweep Flails?
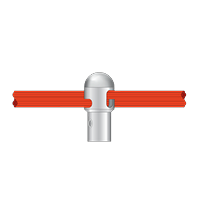
When all the flails are withdrawn, the two halves of the head will separate.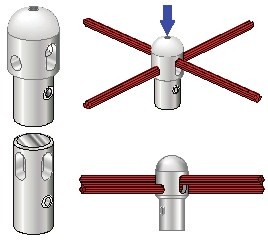
Loosening the grub screw in the top of the dome will enable the withdrawal of the existing flails. Four new hexagonal flails can be bunched and then inserted from each direction. Once in position fully tighten the grub screw. This action forces the two sections apart and locks the flails in position.
